
서론
벌써 마지막 SwiftData 영상이네요.
지금까지는 가볍게 훑어보고 실습하는 영상이어서 그리 어렵다는 느낌은 안 들었는데요.
마지막 Deeper 영상에서는 어떨지 두근거립니다.
참고로 SwiftData 영상은 총 5개로 순서는 아래와 같습니다.
- Meet SwiftData
- Build an app with SwiftData, Migrate to SwiftData
- Model your schema with SwiftData
- Dive deeper into SwiftData
이번 영상에서는 Meet SwiftData와 Model your schema with SwiftData를 선행할 것을 권장하고 있습니다.
WWDC23에서는 영상 챕터를 지원합니다.
이번 포스팅도 영상 챕터를 기준으로 작성되었습니다.
Intro
이번 세션에서는 앱에 SwiftData를 적용하는 모습과 방법을 소개합니다.
크게 세 가지를 아래 순서대로 소개한다고 합니다.
- Configuring persistence : 앱에 persistence를 구성하는 방법
- Track and persist changes : ModelContext를 추적하고 유지하는 방법
- Modeling at scale : 객체 작업을 할 때 SwiftData를 최대로 활용하는 방법
아래 내용부터 스키마라는 개념이 꾸준히 나옵니다.
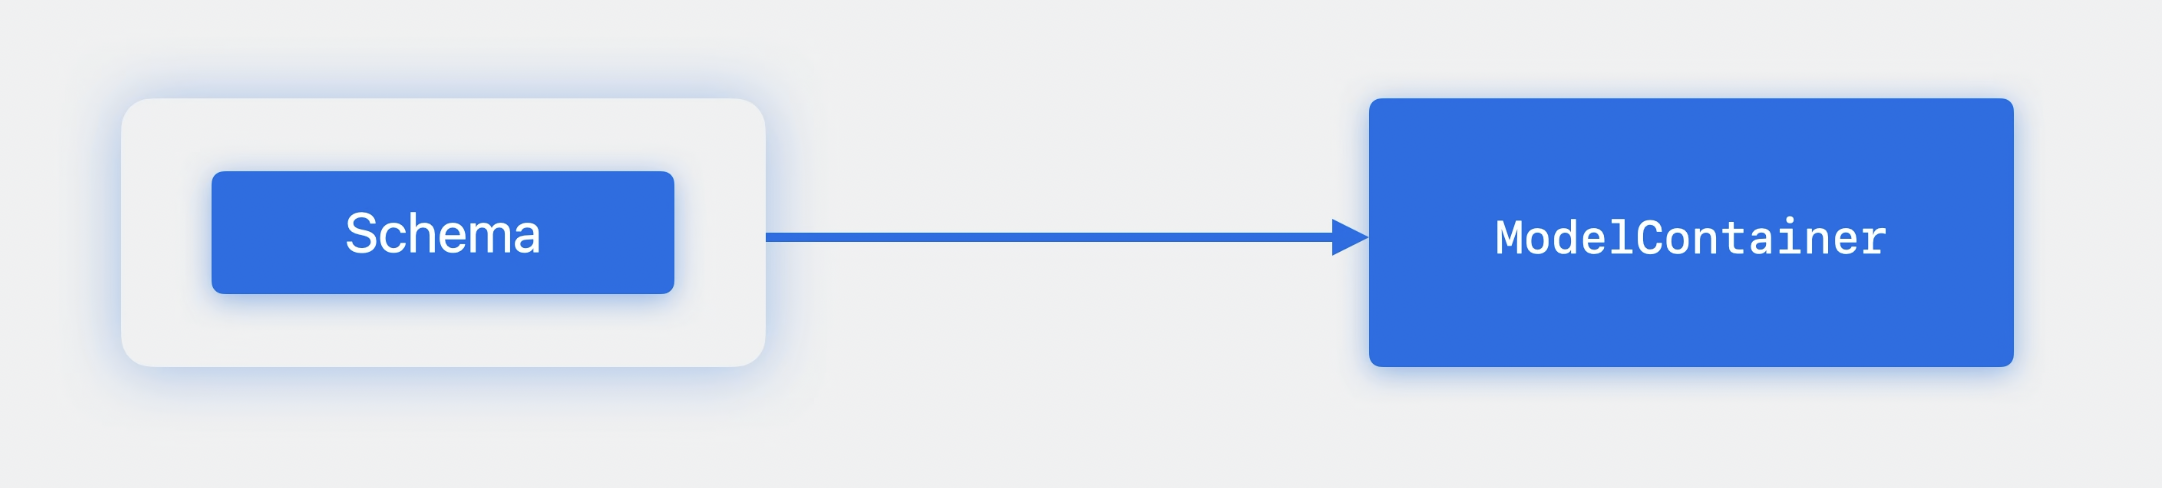
스키마(Schema)는 ModelContainer라는 클래스에 적용되어 데이터를 유지합니다.
ModelContainer는 스키마를 사용하여 Model 클래스의 인스턴스를 가지는 데이터베이스를 생성합니다.
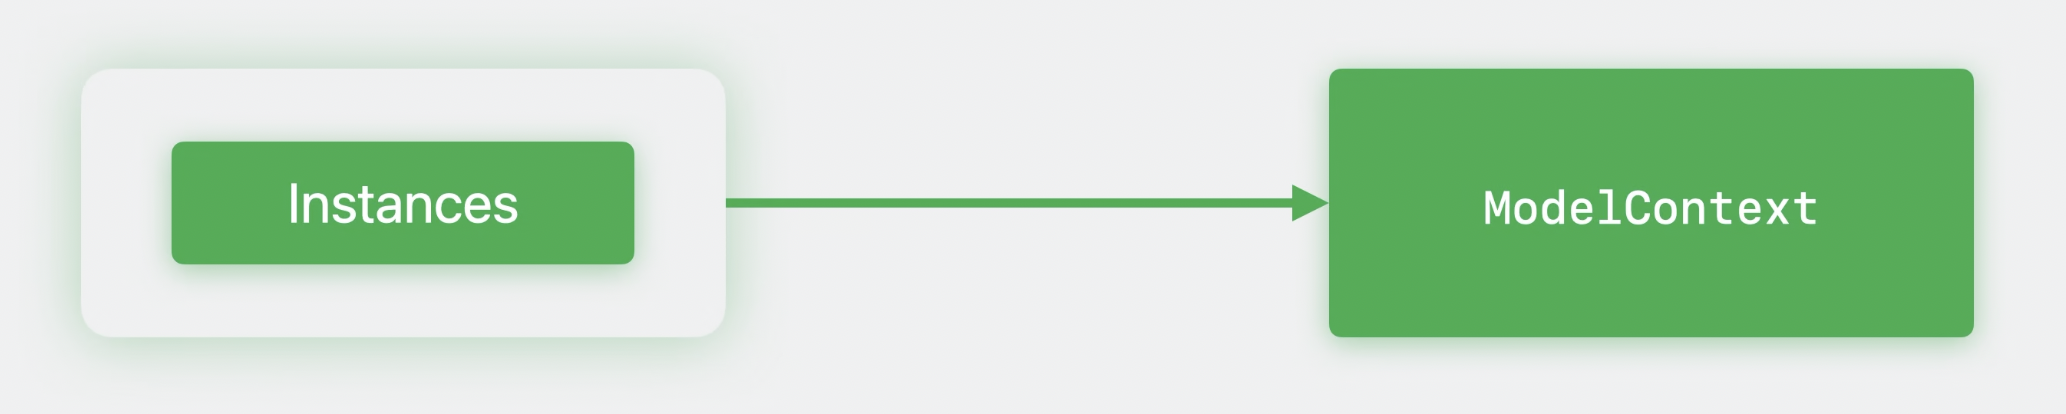
Model 클래스 인스턴스를 작업할 때 해당 인스턴스는 ModelContext에 연결됩니다.
ModelContext는 메모리에서 인스턴스의 상태를 추적하고 관리하는 객체입니다.
이 두 동작은 SwiftData의 핵심입니다.
Configuring persistence
Configuring persistence 챕터에서는 첫 번째 동작을 자세히 설명합니다.
persistence의 구조와 persistence가 어떻게 ModelContainer와 함께 사용되는지 살펴보겠습니다.
ModelContainer
ModelContainer는 데이터가 장치에 저장되거나 유지되는 방법을 설명하는(describe) 곳입니다.
ModelContainer는 쉽게 말해 스키마와 Persistence를 연결하는 다리입니다.
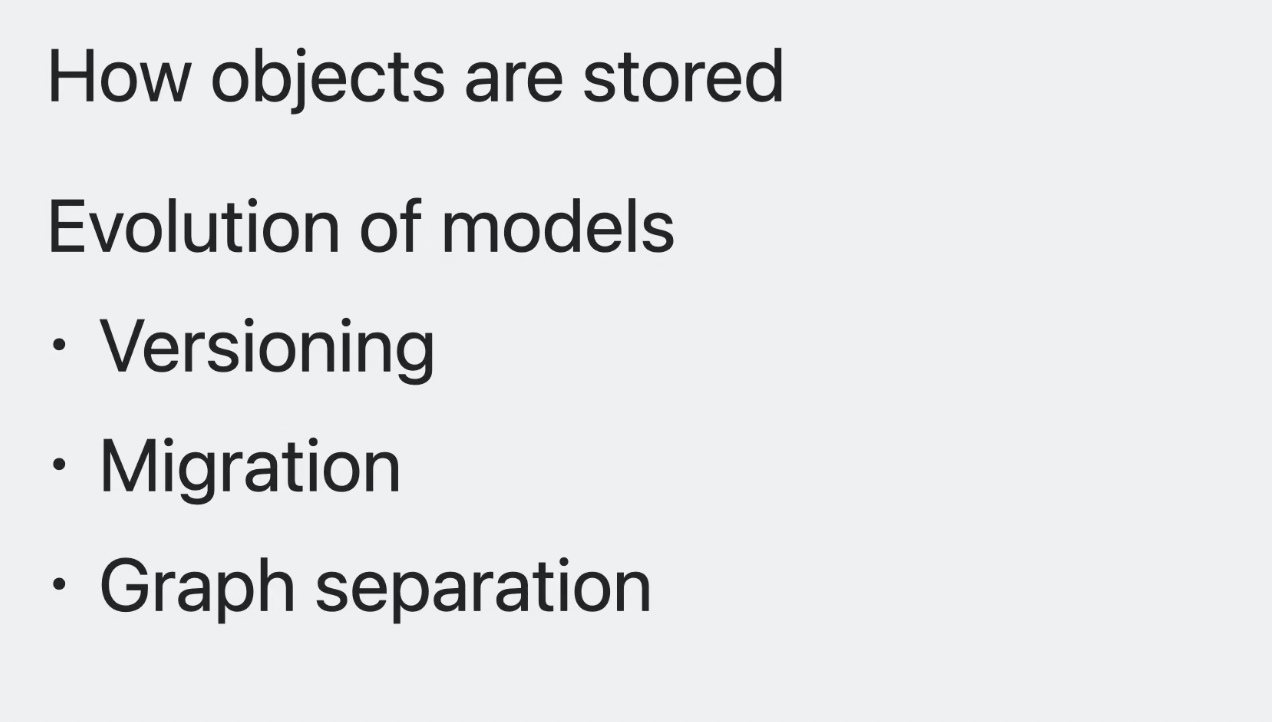
객체가 어떻게 저장되어 있는지(메모리에 있는지 아니면 디스크에 있는지),
SwiftData 모델이 어떻게 변화되었는지 알려줍니다.
let container = try ModelContainer(for: Trip.self)스키마(사용할 타입)를 전달하기만 하면 쉽게 ModelContainer 인스턴스를 생성할 수 있습니다.
위 코드에서는 Trip 단일 타입을 전달했지만, Trip 클래스는 다른 Model 타입과 relationship이 존재하기 때문에 관련 클래스도 자동으로 유추합니다.
let container = try ModelContainer(
    for: [
        Trip.self,
        BucketListItem.self,
        LivingAccommodation.self
    ]
)위 코드의 BucketListItem과 LiviingAccommodation이 자동을 유추되는 모델입니다.
ModelConfiguration
ModelConfiguration을 이용하면 더 복잡한 ModelContainer를 구성할 수 있습니다.
ModelConfiguration는 아래와 같은 스키마의 persistence를 설명합니다.
- 데이터 저장 위치 제어(임시 데이터는 메모리에, 영구 데이터는 디스크에)
- 앱의 권한을 사용하여 자동으로 URL 생성
- Read-Only로 로드하여 중요한 persistence 파일 데이터 보호
- 하나 이상의 CloudKit Container를 스키마에 대한 ModelConfiguration으로 지정 가능
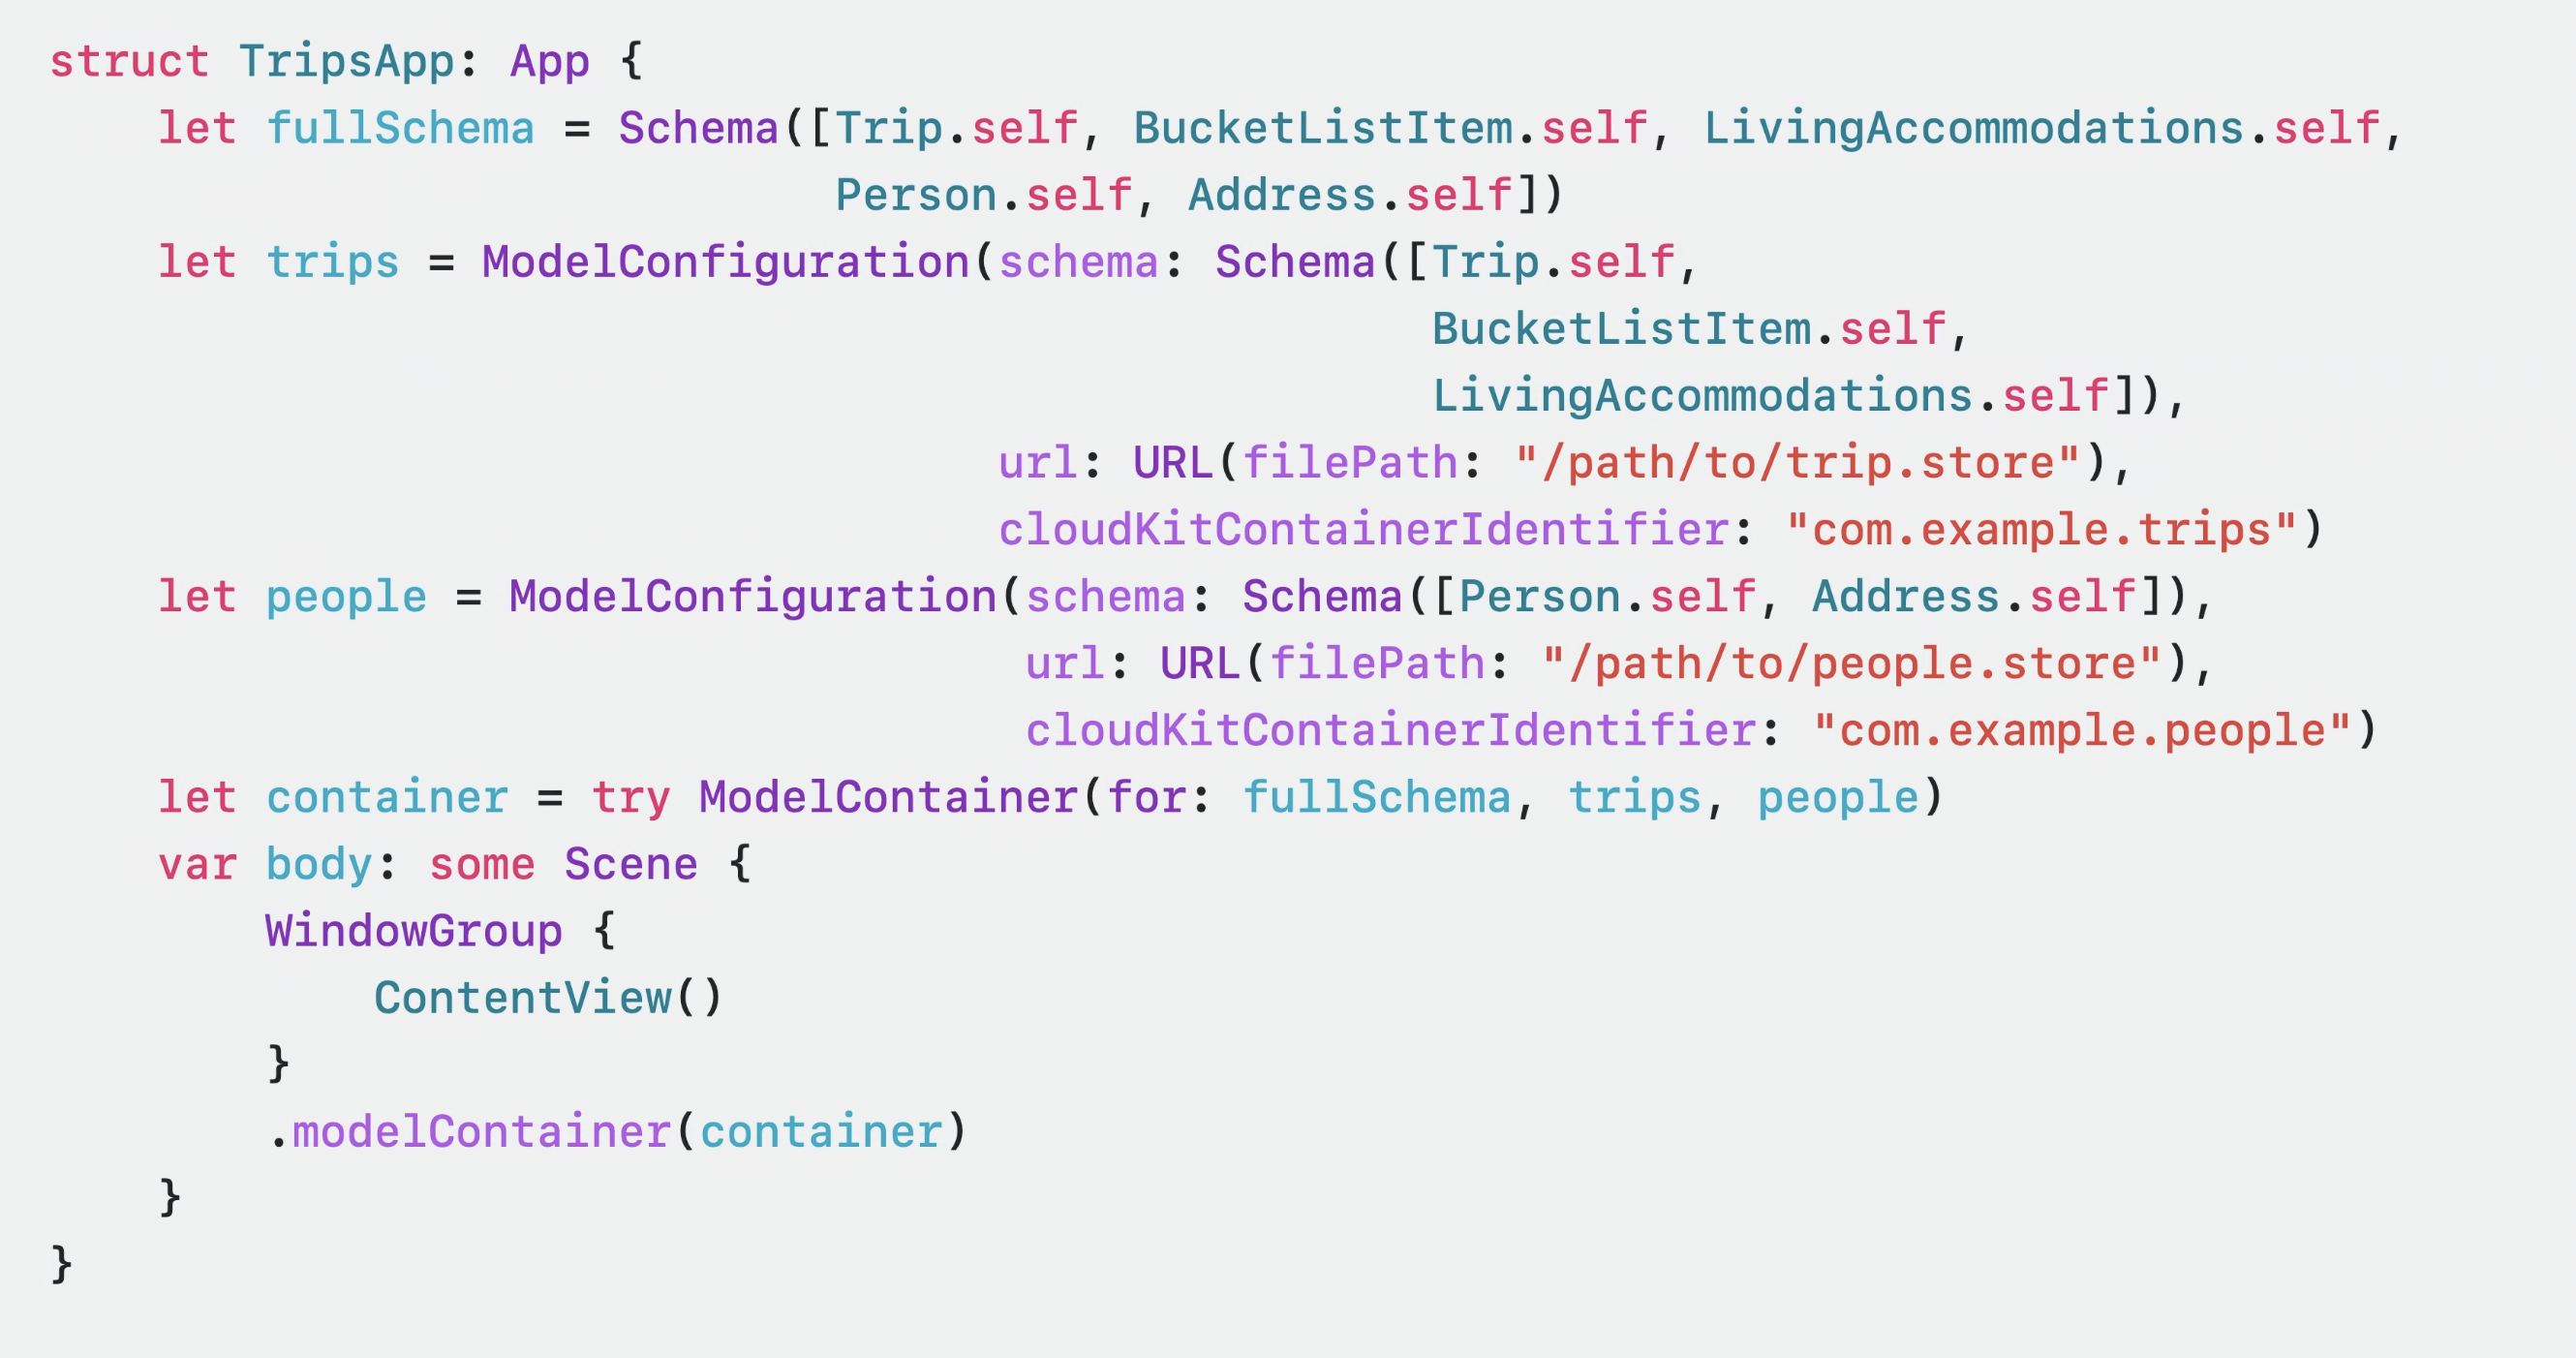
ModelConfiguration을 사용하는 예시를 살펴봅시다.
let fullSchema = Schema([
    Trip.self,
    BucketListItem.self,
    LivingAccommodations.self,
    Person.self,
    Address.self
])먼저 사용할 타입을 전부 포함하는 전체 스키마를 정의합니다.
let trips = ModelConfiguration(
    schema: Schema([
        Trip.self,
        BucketListItem.self,
        LivingAccommodations.self
    ]),
    url: URL(filePath: "/path/to/trip.store"),
    cloudKitContainerIdentifier: "com.example.trips"
)다음으로 Trip과 관련된 스키마를 포함한 ModelConfiguration을 정의합니다.
이때 객체 그래프 데이터를 저장할 url과 데이터를 동기화할 CloudKit 컨테이너 식별자를 함께 작성합니다.
let people = ModelConfiguration(
    schema: Schema([Person.self, Address.self]),
    url: URL(filePath: "/path/to/people.store"),
    cloudKitContainerIdentifier: "com.example.people"
)같은 방식으로 Person과 관련된 ModelConfiguration을 정의해주고,
let container = try ModelContainer(for: fullSchema, trips, people)스키마와 ModelConfiguration을 이용해 ModelContainer 인스턴스를 생성합니다.
이처럼 ModelConfiguration을 사용하면 아무리 복잡한 persistence라도 간단하게 구성할 수 있습니다.
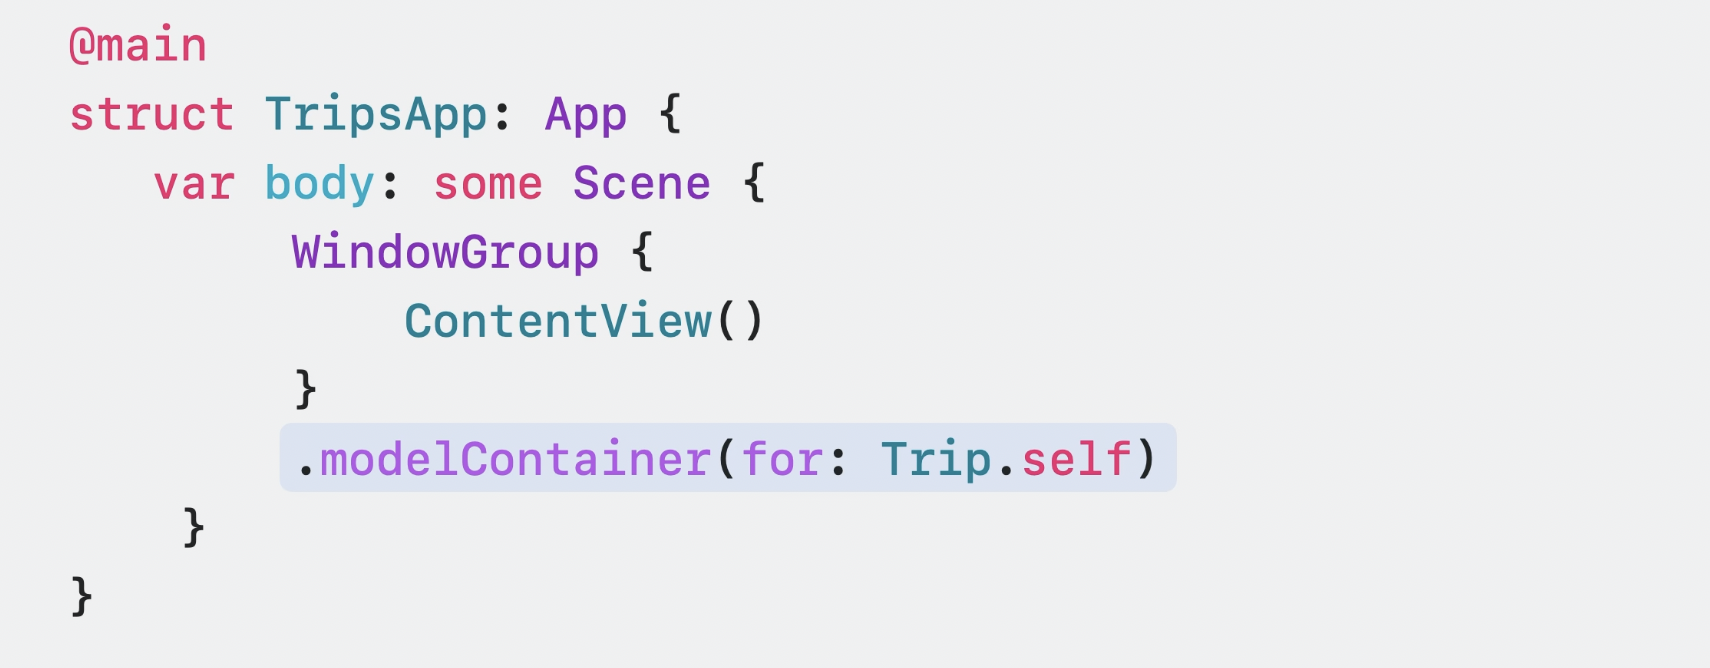
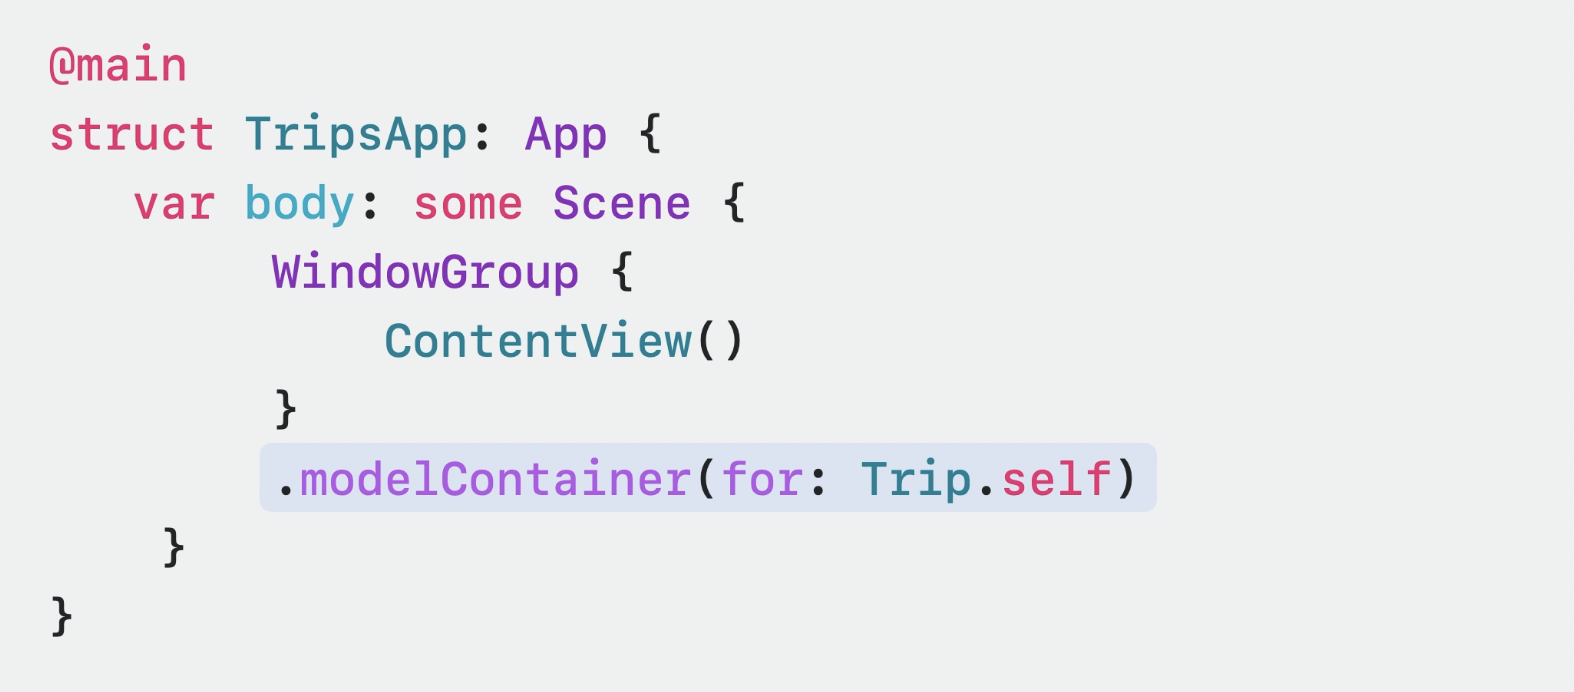
SwiftUI에서는 modelContainer modifier로 ModelContainer를 더 쉽게 생성할 수 있습니다.
modelContainer modifier는 모든 View와 Scene에 추가할 수 있습니다.
위 예시처럼 간단한 ModelContainer를 설정할 수도 있고,
이거처럼 ModelConfiguration을 이용한 복잡한 ModelContainer도 설정 가능합니다.
Track and persist changes
Meet SwiftData에서 살펴본 것처럼 Model과 ModelContext는 가장 자주 사용되는 개념입니다.
이번 챕터에서는 ModelContext가 변경 사항을 추적하고, ModelContainer를 통해 상태를 유지하는 방법에 대해 살펴보겠습니다.
ModelContainer와 ModelContext 사용 모습
View나 Scene에서 modelContainer modifier를 사용하면 ModelContainer를 생성합니다.
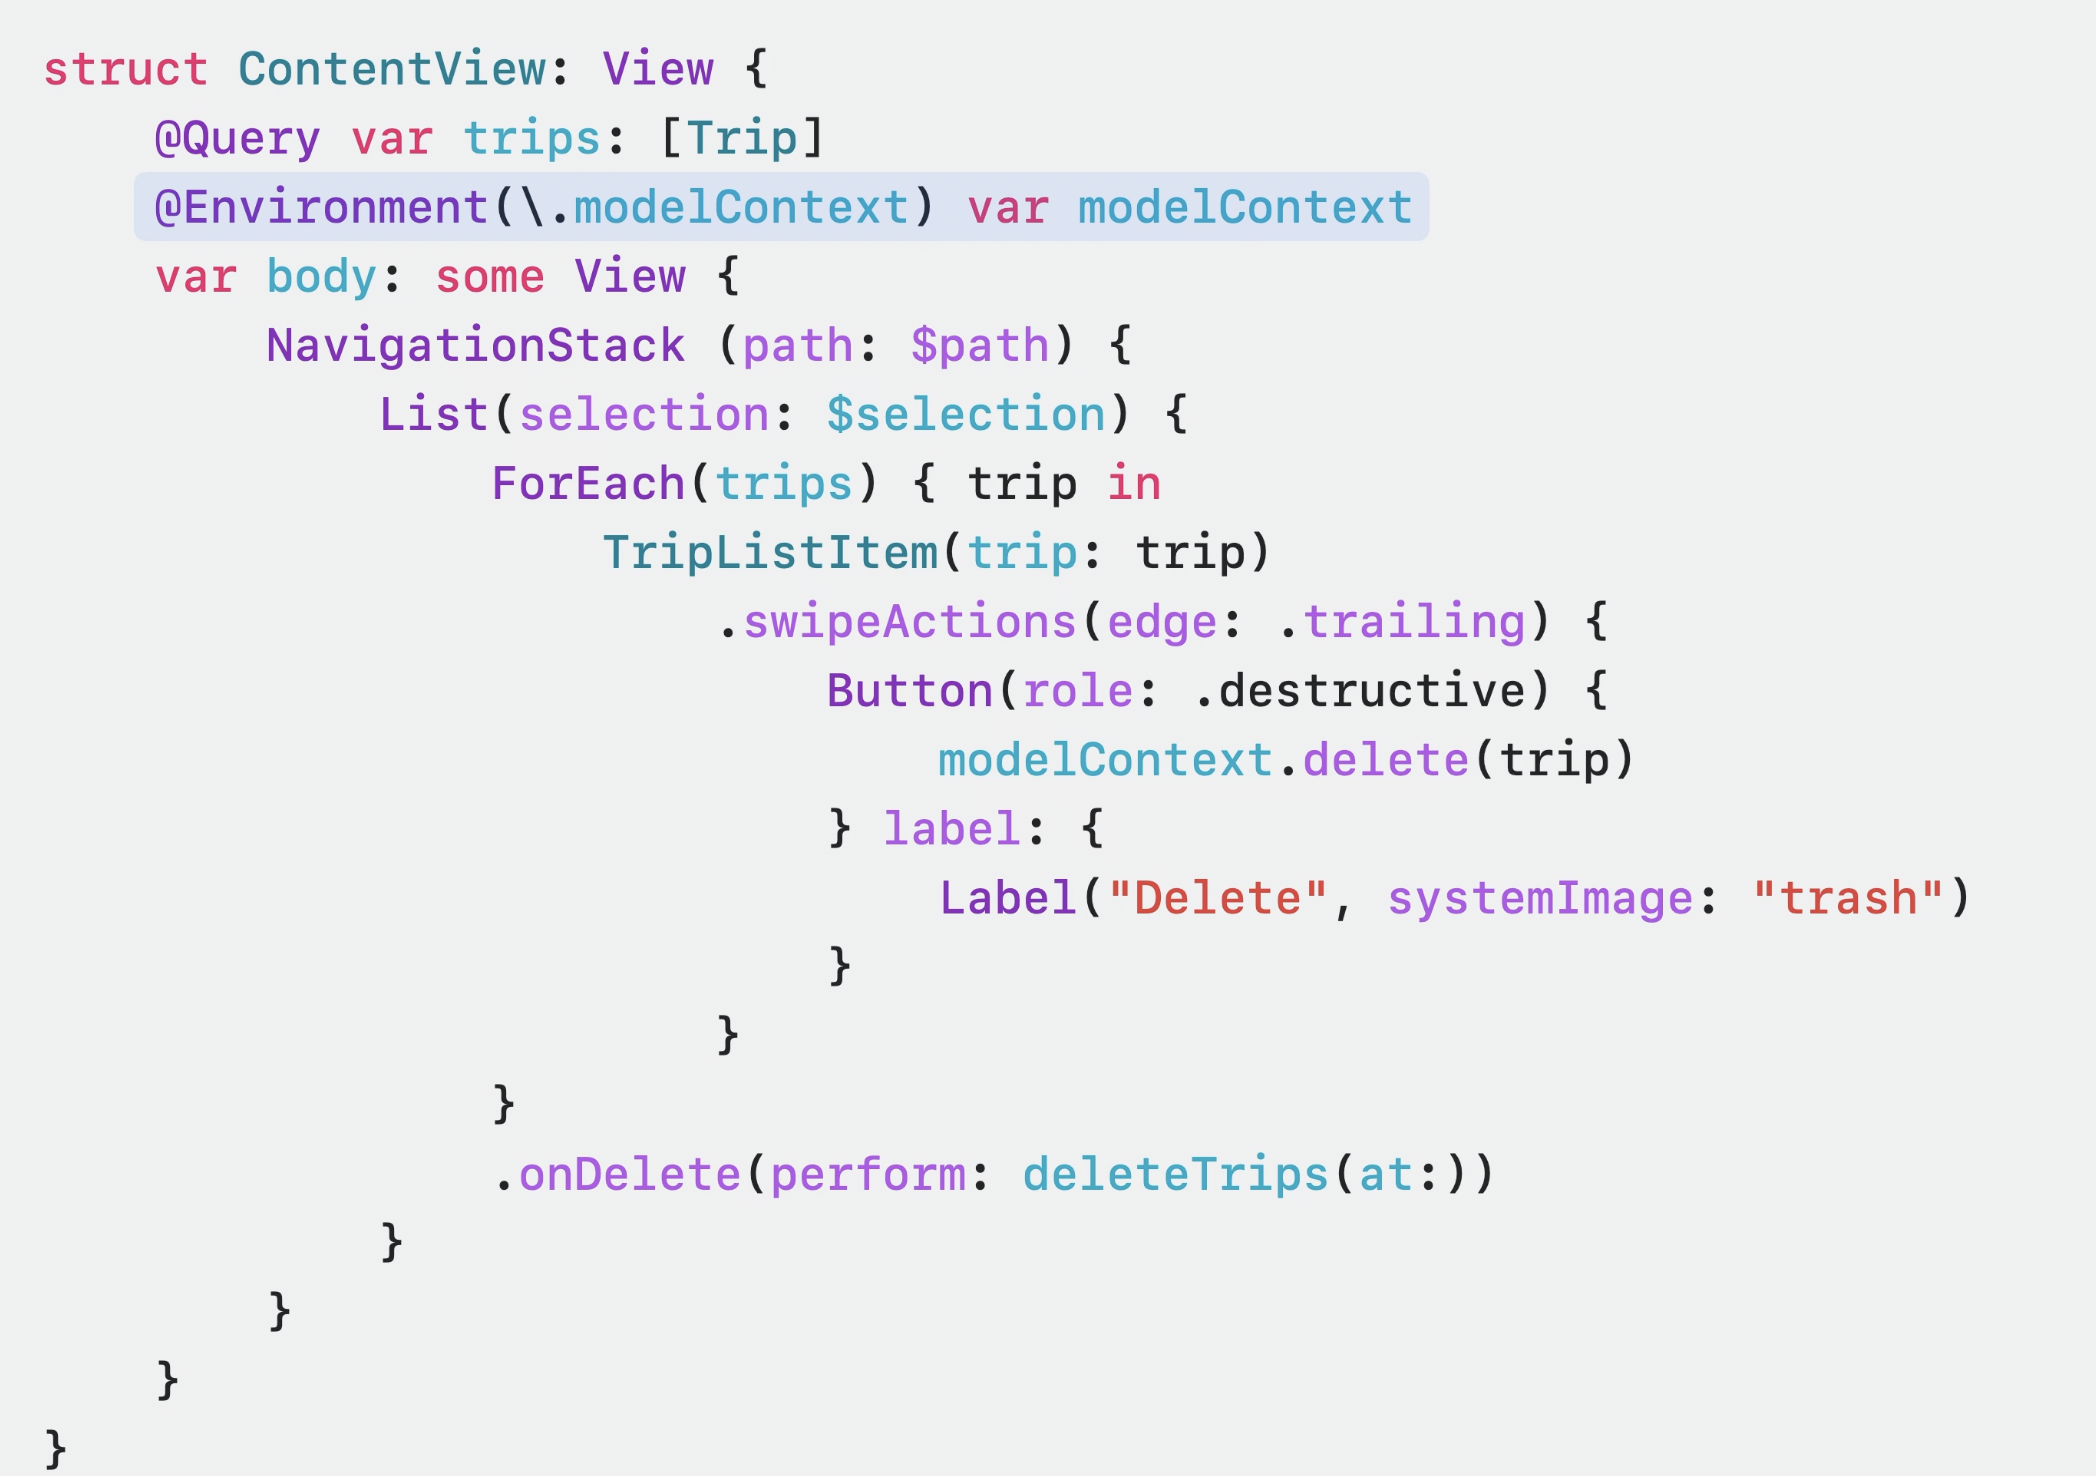
modelContainer modifier는 modelContext에 바인딩 됩니다.
View는 modelContext와 @Query된 trip을 이용해 데이터에 접근 및 삭제하고 있습니다.
ModelContext 동작
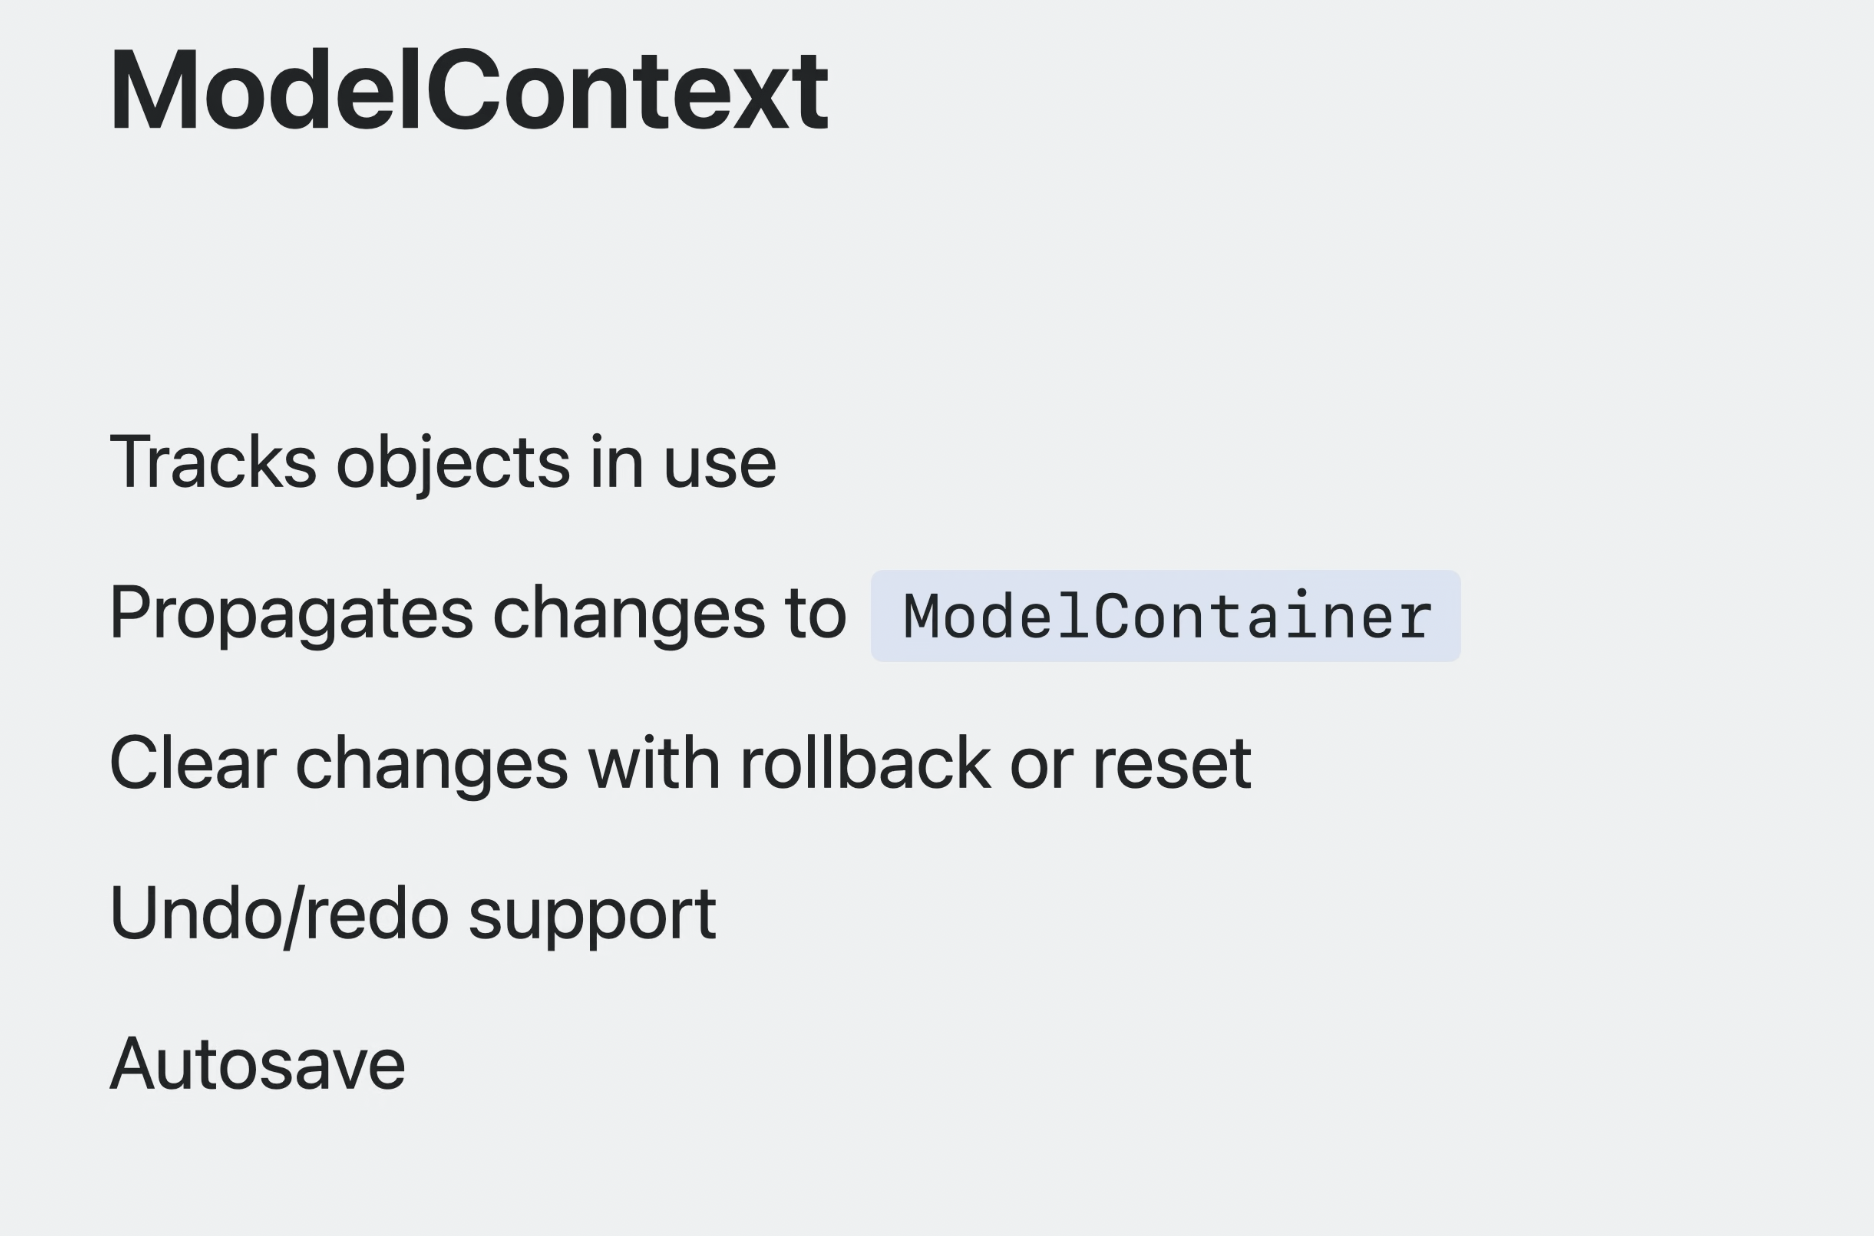
modelContext는 View와 Scene에서 ModelObject를 작업하기 위한 MainActor-aligned 컨텍스트 입니다.
ModelContext는 바인딩된 ModelContainer와 함께 작동하면서 객체를 추적하고 변경사항을 전파합니다.
이 동작은 아래 순서로 진행됩니다.
- 사용하기 위해 로드된 데이터는 Main Context에 fetch 됩니다.
- 데이터가 편집되면 해당 변경 사항이 ModeContext에 스냅샷으로 기록됩니다.
- 변경사항은 context.save( )가 호출될 때까지 추적, 유지됩니다.
- save가 호출되면 ModelContainer에 변경사항을 전달하고, ModelContext에 저장된 상태를 삭제(clear)합니다.
Undo
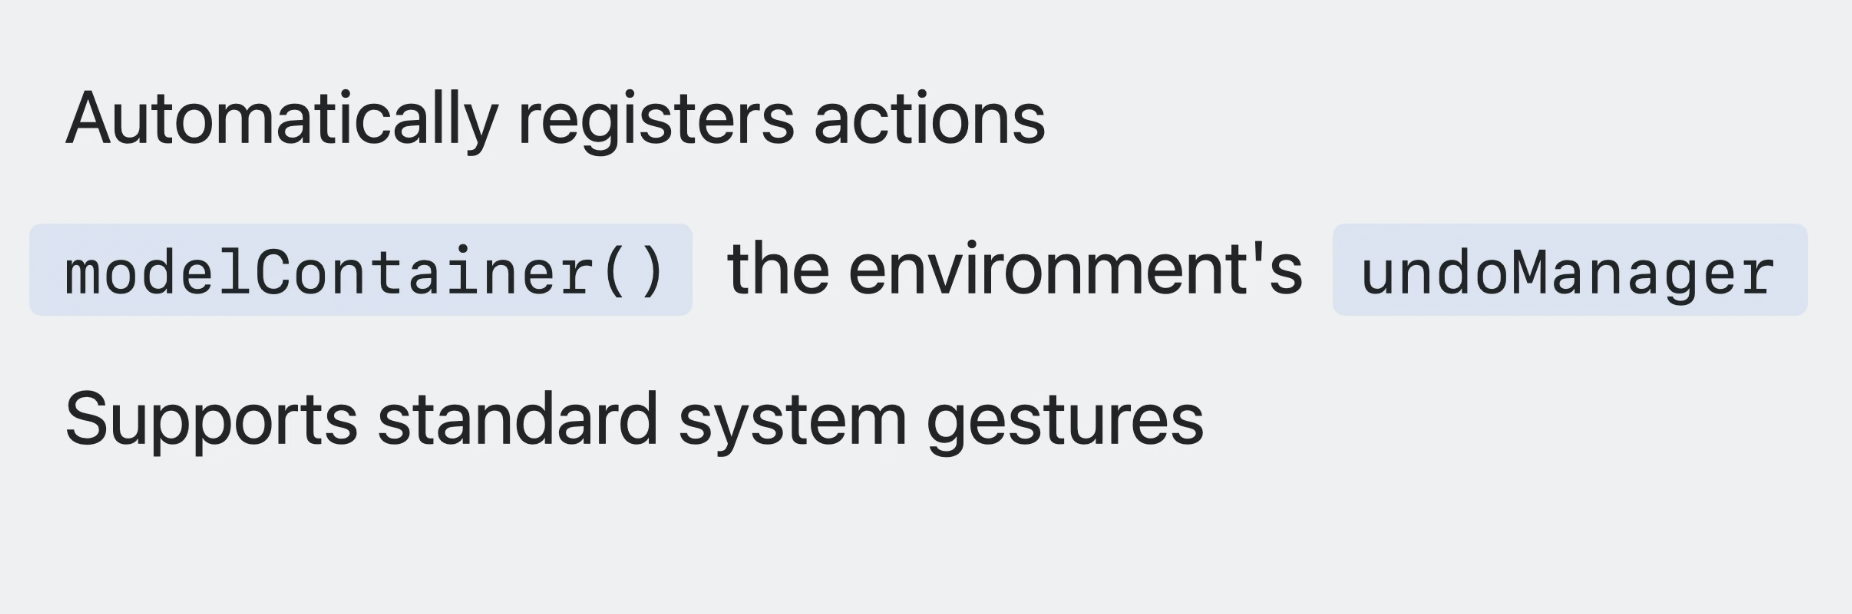
롤백이나 reset도 지원하기 때문에 undo나 자동 저장같은 기능을 구현할 때 적절합니다.
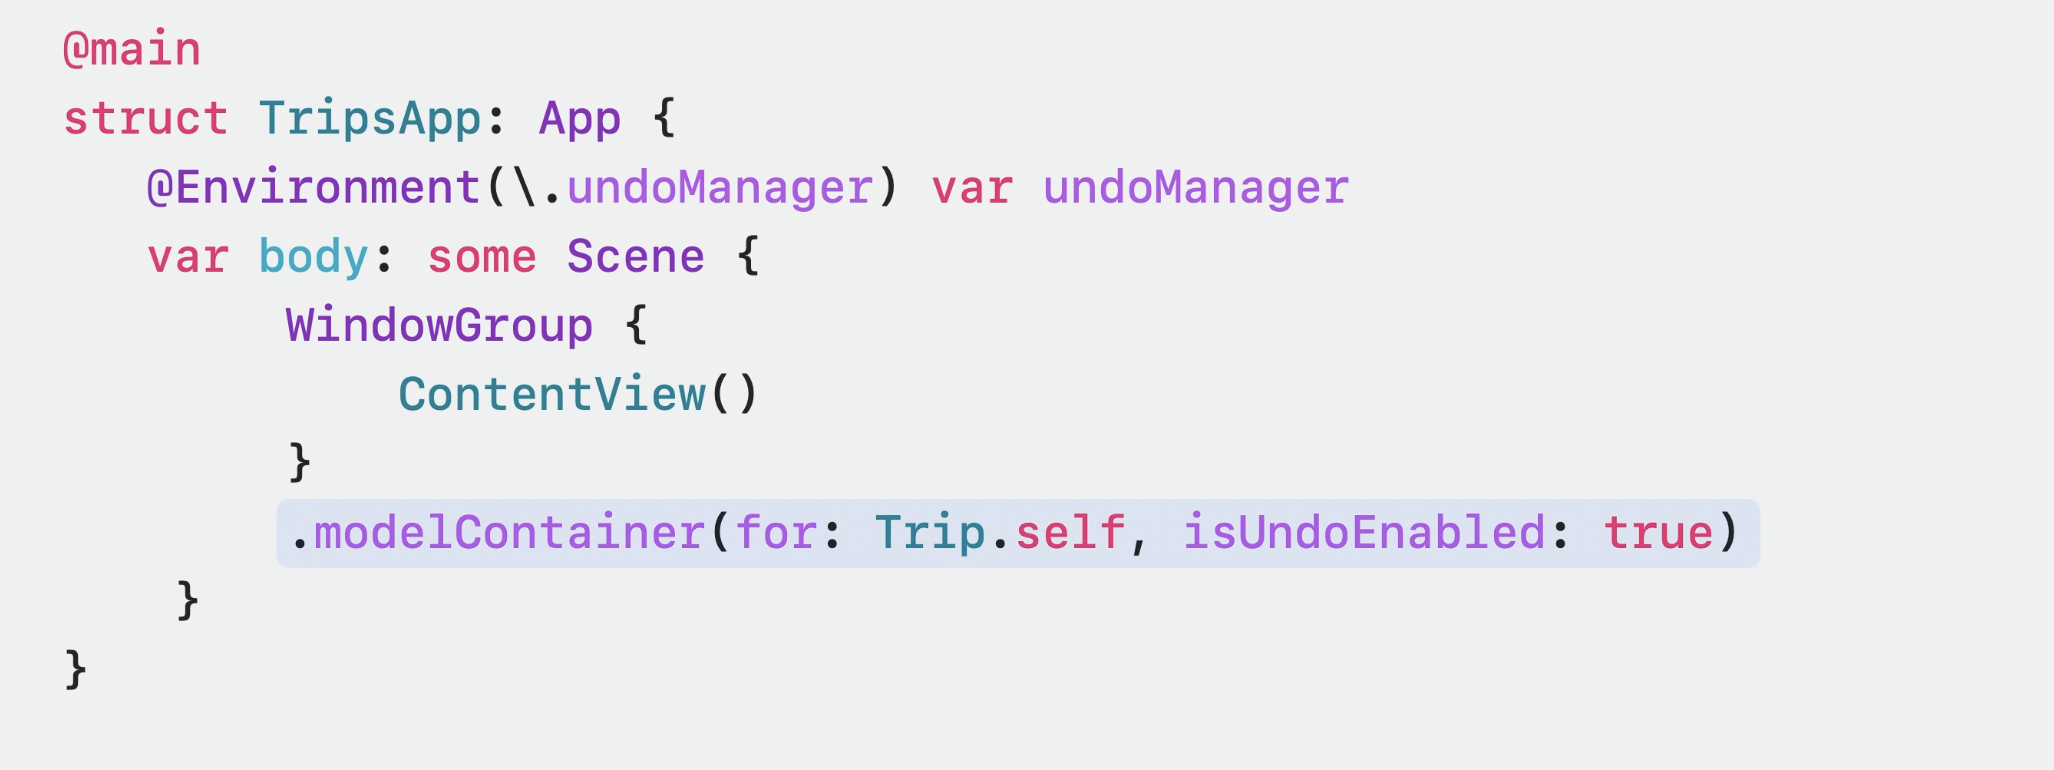
SwiftUI에서는 isUndoEnabled를 구현할 수 있습니다.
modelContainer modifier는 시스템에서 Window(or WindowGroup)의 일부로 제공하는 undoManager를 사용하는데,
isUndoEnabled를 사용하면 이 undo 매니저를 ModelContainer의 mainContext에 바인딩할 수 있습니다.
시스템에서 제공하는 매니저를 사용하기 때문에 추가 구현 없이도 세 손가락 스와이프 혹은 흔들어서 실행 취소같은 기능을 기본으로 사용할 수 있습니다.
Autosave
ModeContext는 자동 저장도 지원합니다.
자동 저장이 활성화되면 ModelContext는 시스템 이벤트(Foreground/Background로 진입할 때 등)가 발생할 때 저장됩니다.
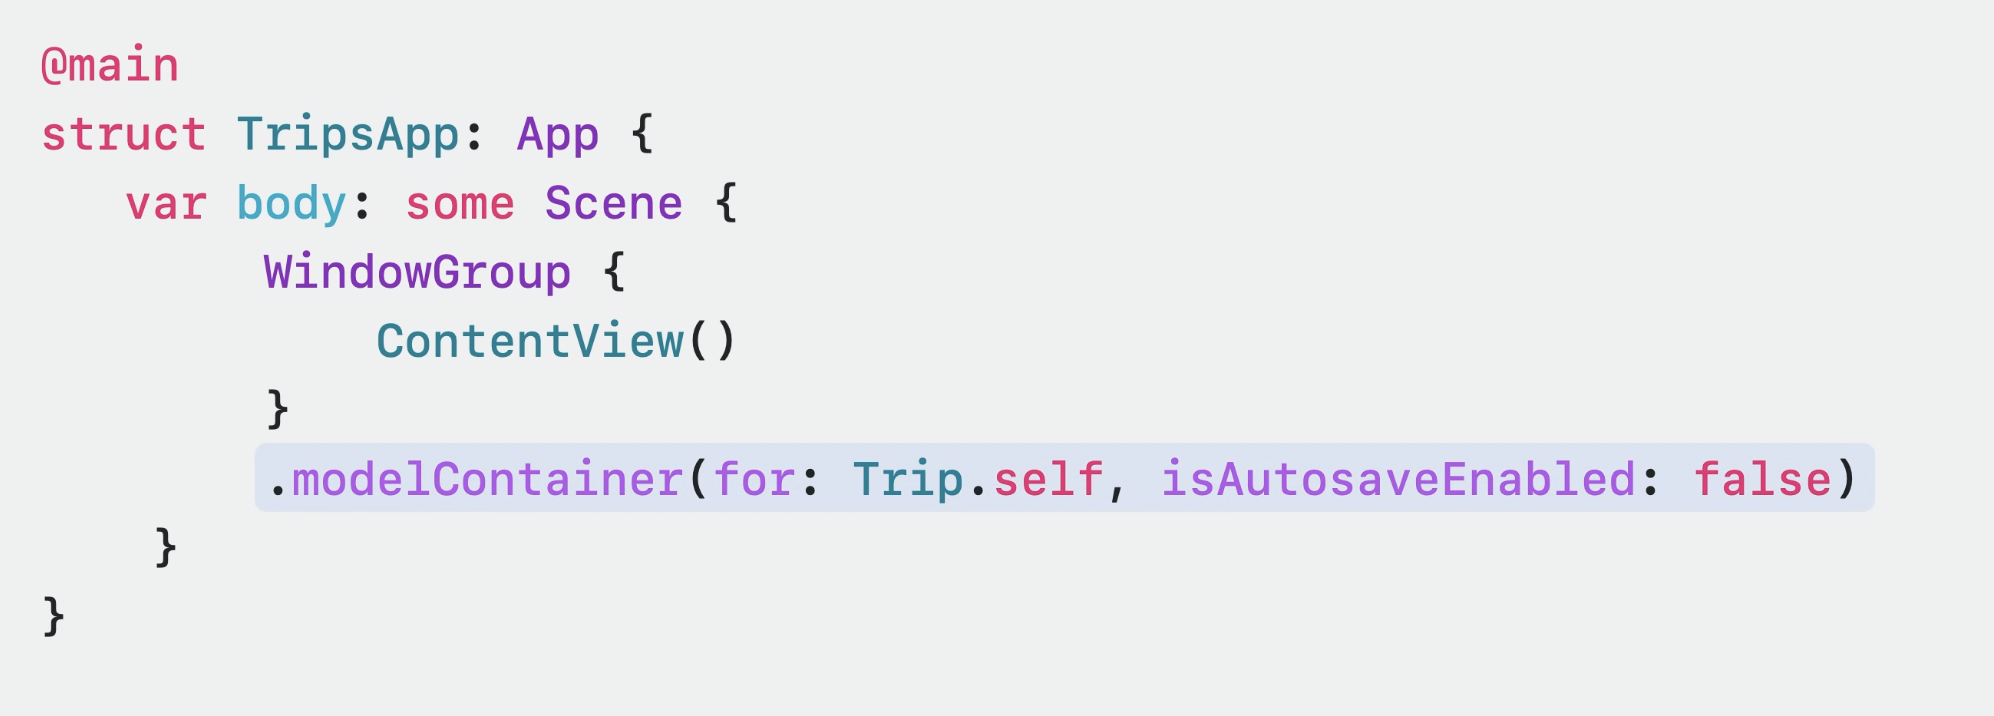
자동 생성된 ModelContext은 기본으로 활성화되며, 원하지 않을 경우 isAutosaveEnabled를 False로 설정하면 됩니다.
수동으로 생성된 ModelContext는 자동 저장 기본값이 False 입니다.
Modeling at scale
이제는 SwiftData를 이용해 쉽고 안전하게 코드 작성하는 법을 살펴보겠습니다.
FetchDescriptor & Predicate
SwiftData의 FetchDescriptor는 fetch를 안전하고 쉽게 만들어줍니다.
왜냐하면 불필요한 캐스팅이나 Result 튜플이 필요 없기 때문입니다.

FetchDescriptor를 이용해 별다른 타입 캐스팅 없이 Trip 배열을 fetch하는 코드입니다.
#Predicate 매크로를 사용하면 복잡한 쿼리도 쉽게 만들 수 있습니다.
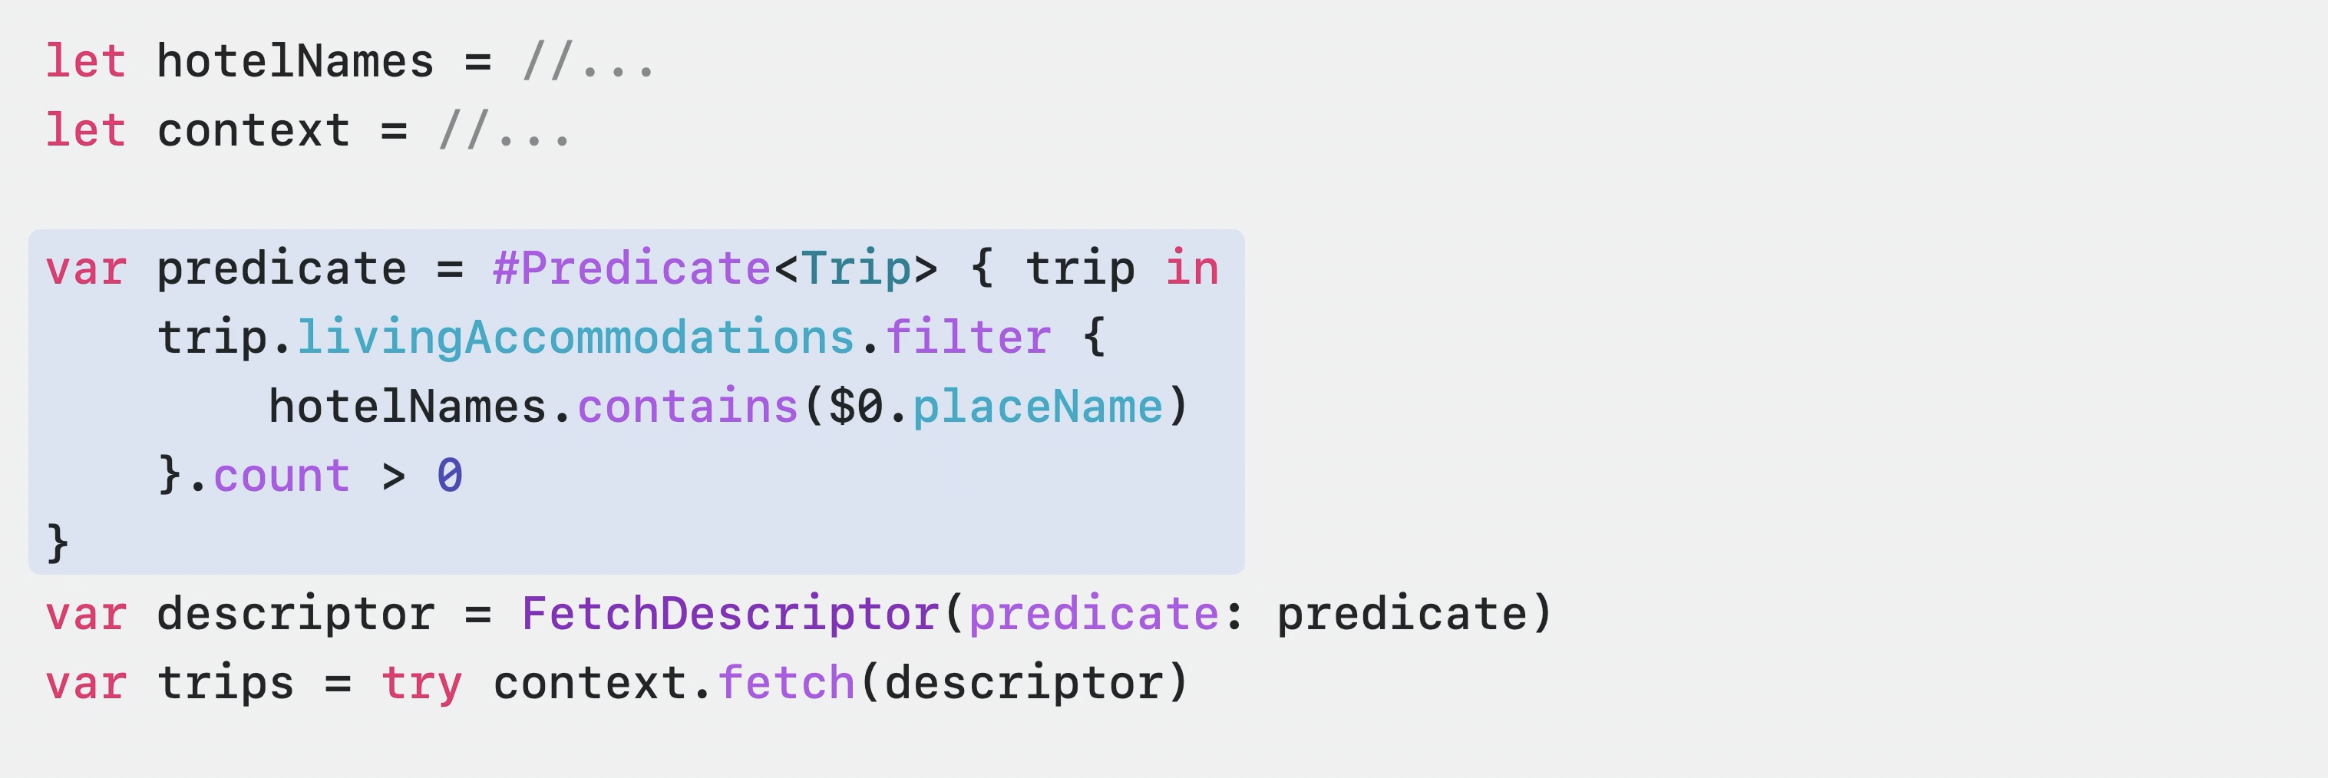
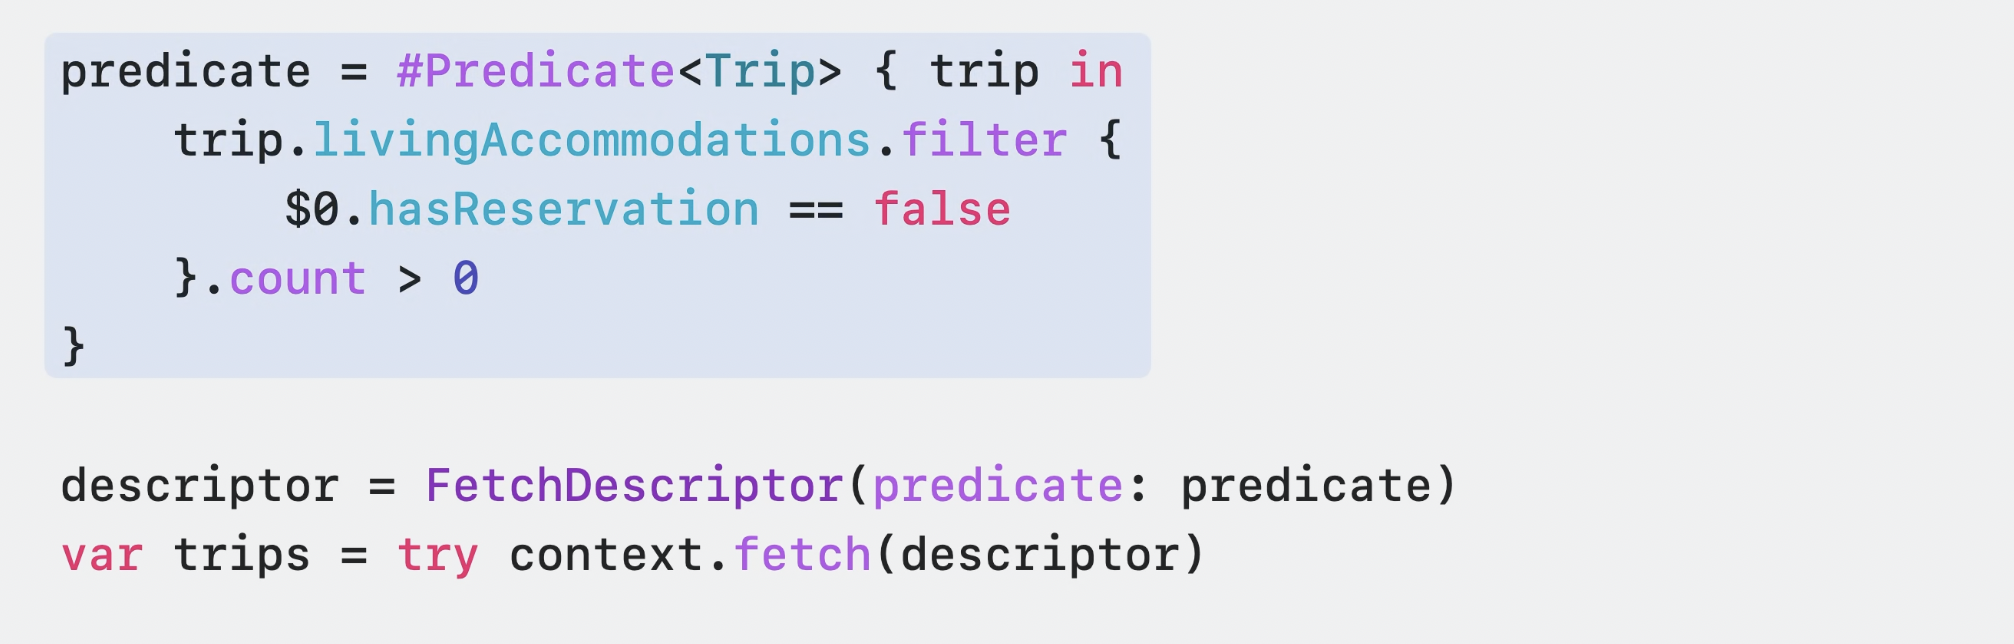
Predicate를 이용해 필터링하여 Fetch하는 코드입니다.
Swift 문법을 이용해 필터링할 수 있다는게 인상적입니다.
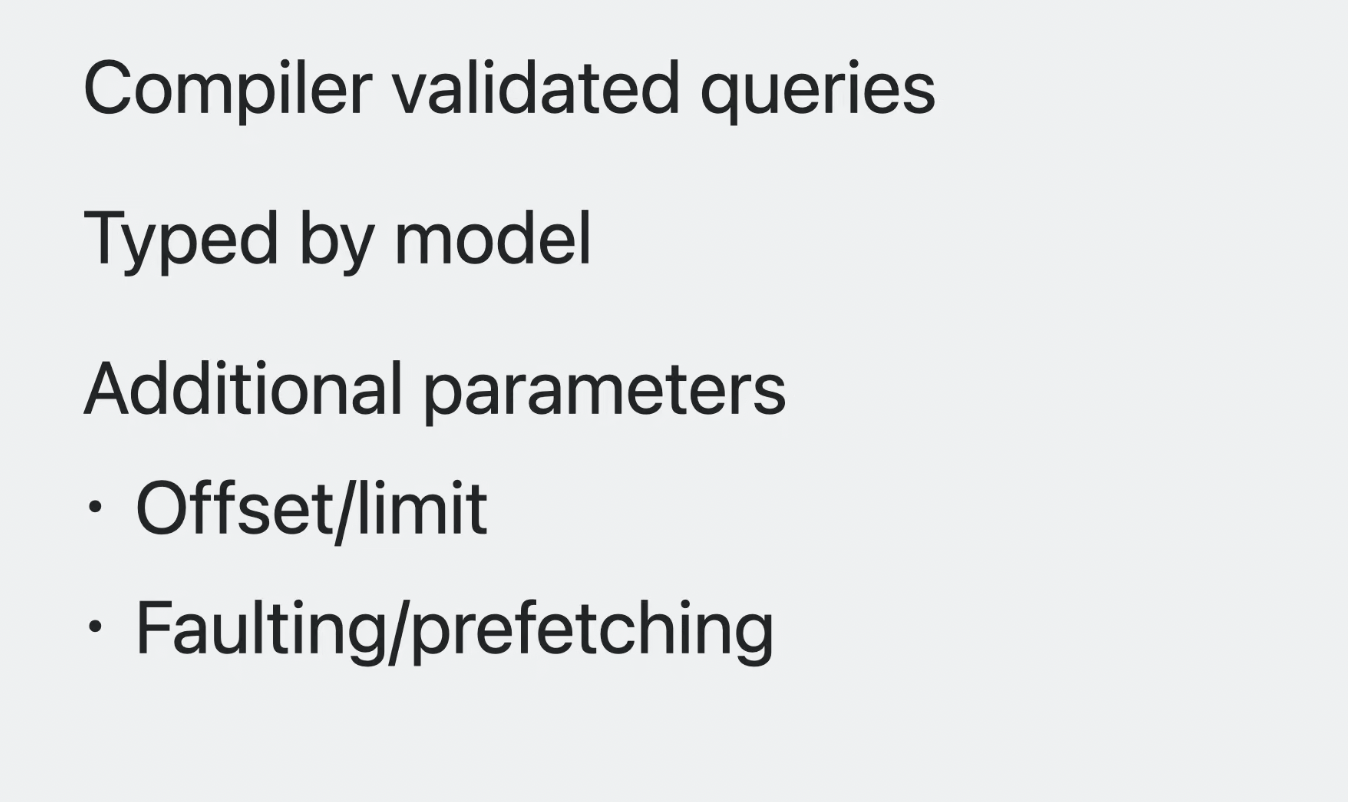
SwiftData는 #Predicate 매크로를 이용해 컴파일러가 검증해주는 쿼리를 사용할 수 있고,
FetchDescriptor 및 SortDescriptor와 같은 제네릭을 사용해 컴파일러에게 타입을 알려줄 수 있습니다.
또한, 파라미터로 Offset, limit같은 추가 옵션과 faulting, prefetching같은 기능도 제공합니다.
enumerate 메서드
enumerate 메서드를 이용해 이 모든 기능을 결합할 수 있습니다.
enumerate 메서드를 이용해 fetch한 데이터를 순회할 수 있습니다.
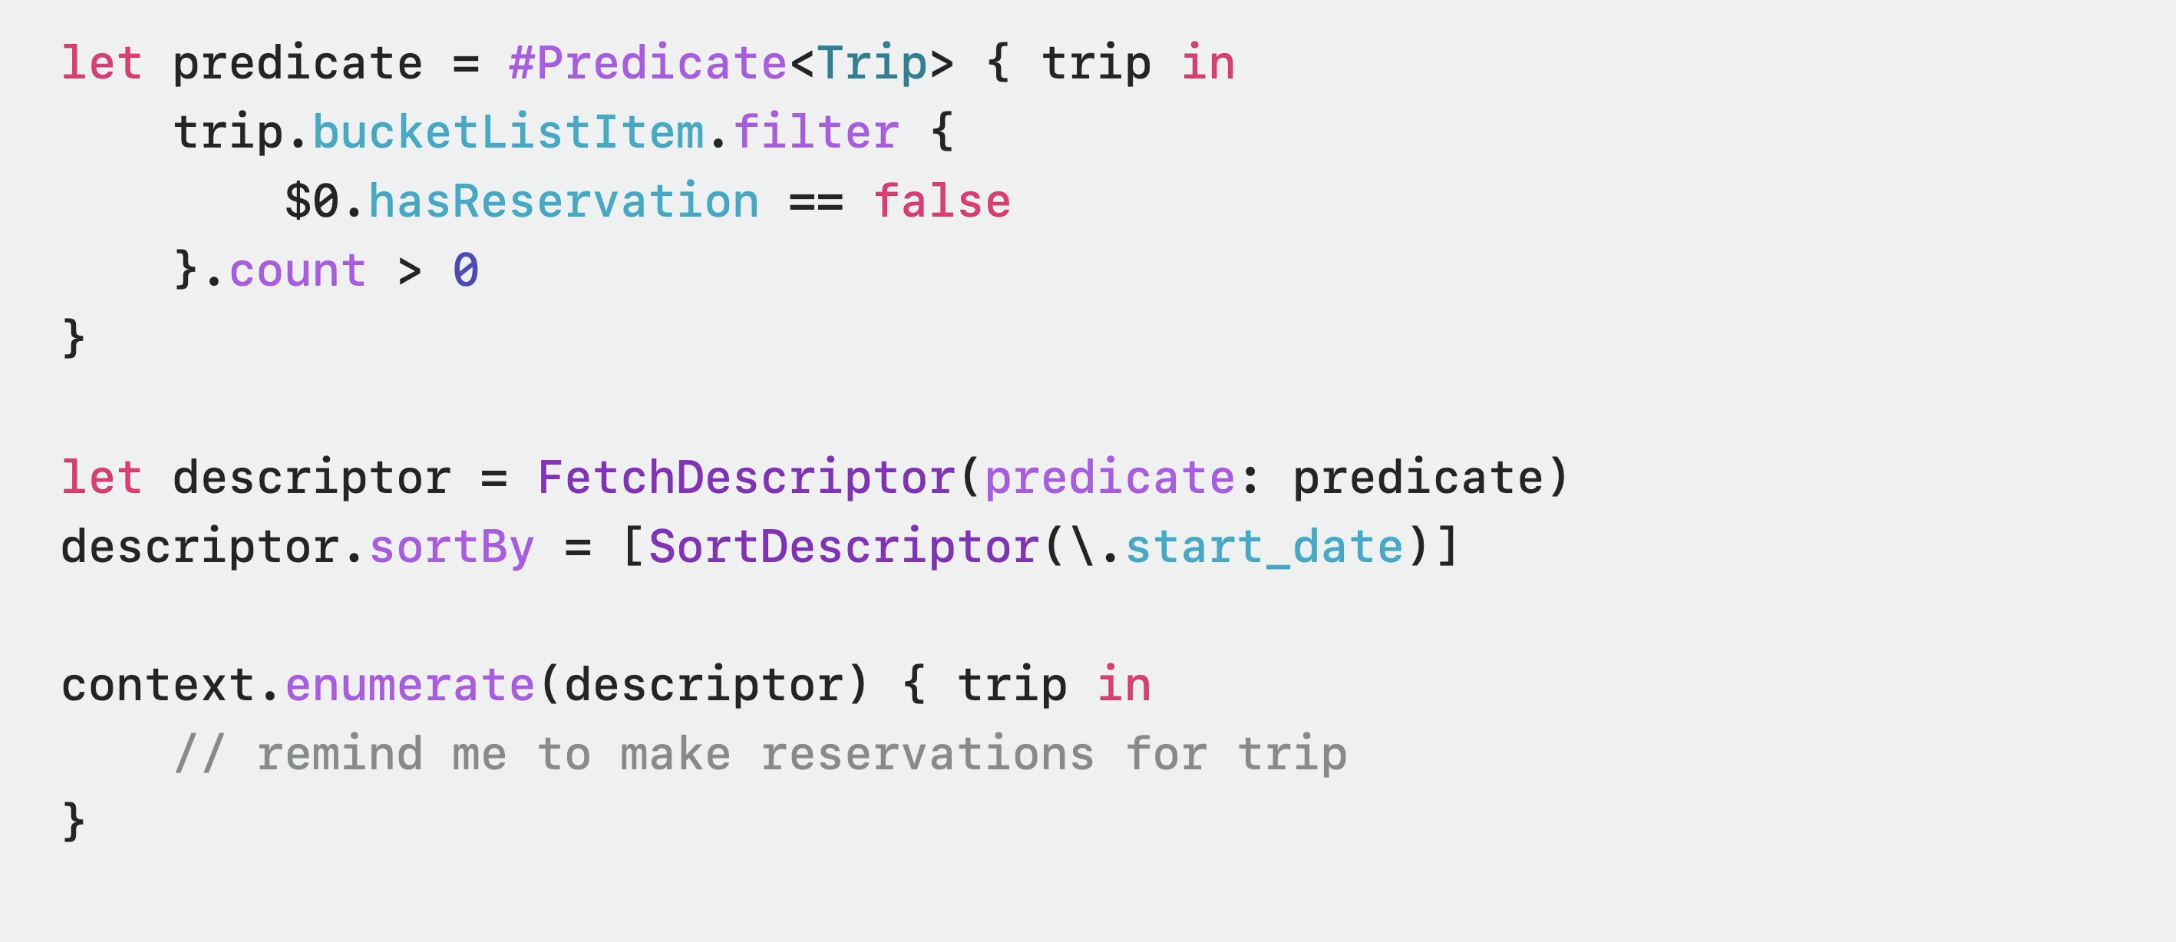
#Predicate로 설정한 조건을 이용해 FetchDescriptor로 데이터를 가져옵니다.
SortDescriptor를 이용해 정렬도 했습니다.
이 descriptor를 enumerate의 매개변수로 전달하면 쉽게 순회할 수 있습니다.


이 순회의 batchSize 기본값은 5000이지만,
batchSize를 직접 설정할 수도 있습니다.
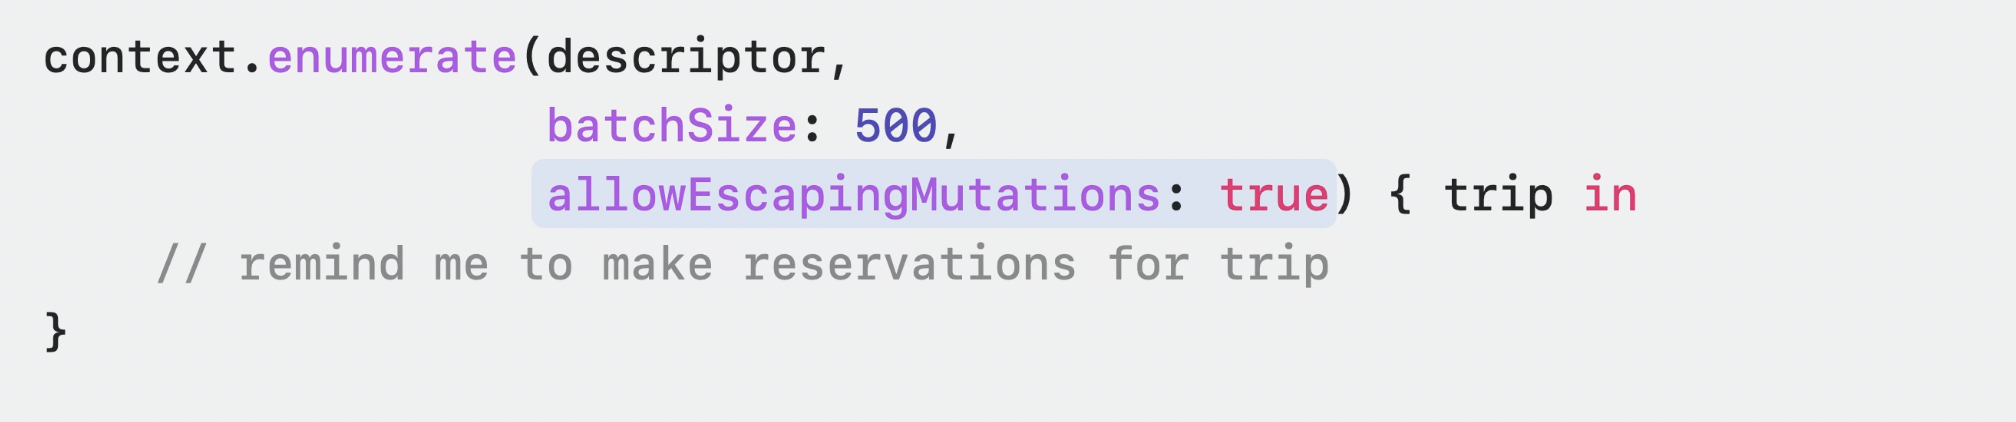
enumerate는 기본적으로 mutation을 허용하지 않습니다. (내부에서 값을 변경하는 동작을 의미하는 듯)
왜냐하면 대규모 순회에서 mutate는 성능 하락을 유발하기 때문입니다.
따라서 enumerate를 수행하는 ModelContext에서 변화가 생기면 throw하여 객체 해제를 못하게 합니다.
(원문: Enumerate also includes mutation guard by default. One of the most frequent causes of performance issues with large traversals is mutations that are trapped in the context during the enumeration.
allowEscapingMutations tells enumerate that this is intentional, when not set, enumerate will throw if it discovers that the ModelContext performing the enumeration is dirty, preventing it from freeing objects that were already traversed.)
mutate를 허용하고 싶은 경우 allowEscapingMutations를 true로 설정해야 합니다.
감사합니다.
아직은 초보 개발자입니다.
더 효율적인 코드 훈수 환영합니다!
공감과 댓글 부탁드립니다.